Dreading the school lunch routine? Try these trusted tips from a savvy mom to make varied lunches that your kids will love!
Kids love variety. Packing the same sandwich and apple every single day might be easy and provide all of the nutrition they need, but can become boring fast. With school starting up again, we asked Annette Arndt (a friend of ours and savvy mom) to share a few tried and trusted tips on what has worked for her family these last 7 years. Here are some of her recommendations.
Clean and cut up your fruits and veggies at the beginning of the week and store it all in one container.
Cut up carrots, cucumbers, broccoli, cauliflower, peppers, apples, kiwi, grapes, strawberries, etc., into quite small sizes so that you can choose a different selection every day.
Cut your vegetables in a variety of ways. For instance, clean a small carrot but leave it whole instead of cutting it up if your child likes to eat carrots bugs bunny style. Or cut the carrots into thin little sticks (julienne style) that can be eaten as is or added to a pita sandwich. You can even cut larger carrots into quarters and then use a cookie cutter to punch out a small flower that pops into the mouth. Lastly, you can cut carrots into plain old carrot sticks. This way, even if your child is having carrots every day, they still look different.
Make or buy mini muffins.
It might be challenging for kids to finish a large muffin within the 10–20 minutes provided at school for lunch. Offer mini muffins instead. Annette’s kids love corn muffins, carrot muffins, and raisin bran muffins. You can also vary the mini muffins and put two different ones in at the same time to make lunch a little interesting as well.
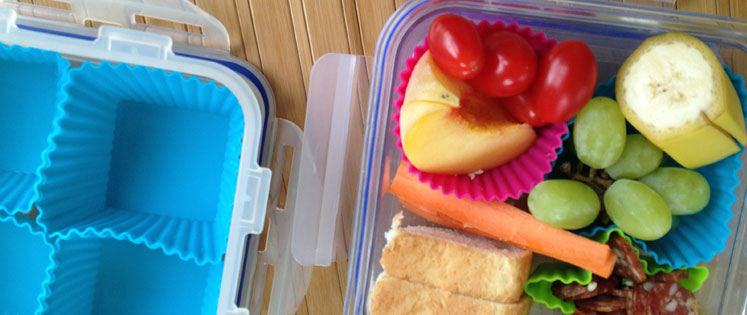
Pack everything into one single school lunch container.
Section off a “Lock and Lock” container with silicone cupcake molds. For example, put in 2 carrot sticks (2″ long), 4 grapes, 3 grape tomatoes, 3 slices cucumber, one small broccoli floret and one slice of apple into two or three of the molds. This gives your child a colourful selection and will ensure your child will have something to choose from.
Use the other sections or section, depending on how much you used for fruits and vegetables, to put in foods from the Grain Products, Milk & Alternatives and Meat & Alternatives food groups. You can create a “make your lunch” kit by rolling up lunch meat (2 or 3 slices) and either some pita or a slice of bread (quartered) that your child can put all together at school. Annette’s kids love “making” their lunch that way.
Prep some of the foods the night before.
Prep some of the foods in the container the night before and stack the containers in the fridge (if packing for more than one child). The next morning, add the bread or other missing foods and put it into the lunch bags with a small ice pack and off they go!
Use dinner leftovers.
Had Greek food the night before? Put in about 1/4 cup of small tomato cucumber salad. Cut the chicken souvlaki into bite size pieces and put 4 of them on a small skewer. Cut a quarter of a Greek pita into small wedges. Add a small amount of tzatziki or hummus to dip into. Finish it with about one or two tablespoons of rice, if you’d like. It makes a yummy lunch and will help you finish off the leftovers in your fridge.
Remember not to give them too much of one thing so that school lunch stays varied and interesting.
Visit the Better Together Pinterest Board on Packing a Lunch to stimulate your creativity for packing lunches.
Do you have tried and tested tips you would like to share? Leave us a comment below.